
Before you call a service technician and drop $200 on a house call, take a breath. Many refrigerator problems that seem catastrophic are actually simple fixes you can handle yourself. A faulty door seal, dirty condenser coils, or a stuck thermostat often account for what looks like a major malfunction. This guide walks you through diagnosing the most common refrigerator issues and shows which ones you can tackle with basic tools and which truly need a pro. You’ll save time, money, and the frustration of a warm fridge during dinner prep.
Table of Contents
ToggleKey Takeaways
- Many common refrigerator problems like dirty condenser coils, clogged defrost drains, and worn door seals are simple fixes you can handle yourself in 20 minutes or less, saving $200+ on service calls.
- If your fridge isn’t cooling, always start with the basics: check the thermostat setting, inspect the condenser coils for dust buildup, and verify the fans are running before assuming major failure.
- Clearing a frozen or clogged defrost drain using warm water and a turkey baster resolves approximately 30% of refrigerator cooling complaints.
- Test your door gasket with the dollar-bill method—if it slides out easily, the seal is worn and needs replacement, which is a simple 10-minute snap-in fix costing $50–$150.
- Know when to call a professional: refrigerant leaks, failed compressors, and sealed-system repairs require a licensed technician and cost $300–$1,000, while DIY solutions work for maintenance and common issues.
- Clean condenser coils every 6–12 months using a coil brush and vacuum; dirty coils are the leading cause of poor cooling and reduced efficiency in refrigerators.
Diagnose Common Refrigerator Problems
Not Cooling Properly
A fridge that won’t cool ranks high on the panic meter. Start with the simple checks before you assume the compressor is dead. Make sure the thermostat is set correctly, many warm-fridge calls end when someone realizes it’s dialed to the warmest setting. Next, feel the coils on the back or underneath the unit. If they’re not warm to the touch, the compressor isn’t running. If they’re ice-cold or frosted over, airflow blockage is likely your culprit.
Check the evaporator fan (the fan inside the fridge that pushes cold air) to see if it’s running when the compressor cycles on. You’ll hear a light hum or feel air moving from the vents. No sound? The fan motor may be frozen or stuck. Also look at the condenser fan (back or bottom of the unit). Dust buildup here is the number-one cause of poor cooling, and it’s the easiest fix on this list.
Unusual Noises and Leaks
A grinding or squealing noise often points to a failing compressor, fan motor, or damaged compressor mount. Listen carefully to pinpoint where it’s coming from, underneath, the back, or inside the compartment. A rattling or clicking sound may mean a loose component or an ice buildup in the defrost system. These warrant a closer look but rarely demand immediate professional help.
Water pooling under or inside your fridge suggests a drainage issue. The defrost drain (a small hole near the back of the interior) can freeze or clog with food particles. If water backs up here, it pools inside. A clogged drain at the bottom (exterior) blocks water runoff. Both are easily cleared with warm water or a plumbing snake. If water appears in the fridge compartment itself rather than pooling below, the door seal may be failing, warm air gets in, moisture condenses and collects.
Fix the Most Common Issues Yourself
Clear the defrost drain. Locate the drain hole (usually a small opening at the rear interior wall or under the crisper drawers). Using warm water and a turkey baster or syringe, flush the hole from inside. If that doesn’t work, go to the exterior drain line (beneath the fridge) and gently push a plumbing snake or thin wire through it. Frozen blockages may require thawing with a hair dryer before flushing. This single fix resolves roughly 30% of cooling complaints.
Reset the thermostat. If cooling is weak and the compressor is running, turn the dial to the coldest setting for 10 minutes, then back to your desired temperature (usually 37–40°F for the fridge, 0°F for the freezer). Some models have a spring-loaded reset button you may need to press. Refer to your owner’s manual for exact location and procedure.
Inspect and clear the air vent. The vent that channels cold air from the freezer to the fridge can frost over or be blocked by food items. Open your fridge and look for vents at the top or back. Remove any ice by hand (use a plastic scraper, not metal, to avoid puncturing coolant lines). Make sure shelves or containers aren’t blocking airflow.
Check the door seal. Close the door on a dollar bill. If it slides out easily without resistance, the gasket is worn and needs replacement. A bad seal lets warm air leak in constantly, forcing the compressor to run nonstop. Compare your fridge model online or call the manufacturer for the correct gasket part number. Installation is a 10-minute swap: release the old gasket from its groove (usually just a push-fit or clips) and snap the new one in place.
You can read step-by-step instructions for diagnosing and fixing common refrigerator problems to supplement these basics. Each model varies slightly, so checking your specific manual is always worth the time.
Clean and Maintain the Condenser Coils
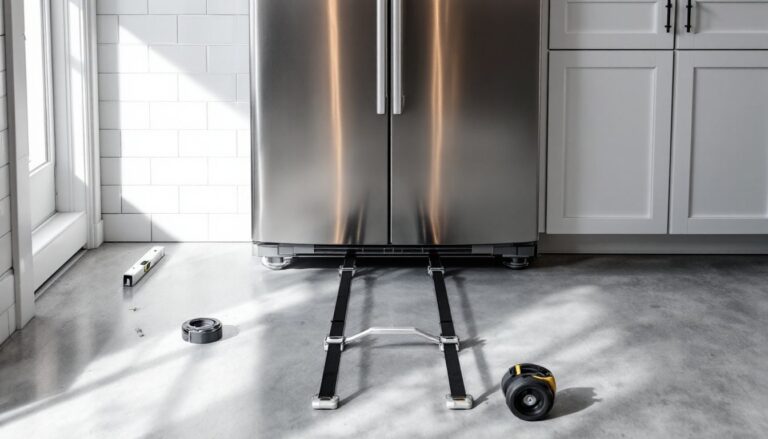
Dirty condenser coils are the silent killer of refrigerator efficiency. Over months, dust and pet hair coat these coils and trap heat, forcing your fridge to work harder and cool less. The coils are located on the back of the unit or beneath it (check your manual). This job takes 20 minutes and requires only a stiff brush and a vacuum.
Unplug the refrigerator first, never work on an appliance while it’s powered. Remove the lower front grille if your model has one (usually two or four clips or screws). Locate the coils. Using a refrigerator coil brush (a long, rectangular brush designed to fit between coil fins), brush downward and outward to dislodge dust. Follow with a vacuum to capture the debris. For stubborn grime, a soft-bristle brush and compressed air work well. Avoid water or liquid cleaners near electrical components.
Replace the grille, plug in the unit, and allow 10 minutes for the compressor to restart before opening the door. You should notice improved cooling within hours. Repeat this cleaning every 6 to 12 months, depending on dust levels in your home. Homes with pets or in dusty climates need more frequent cleaning.
Replace the Door Seal and Thermostat
A worn door gasket (seal) is a common culprit behind temperature swings. If your dollar-bill test showed the seal is shot, replacement is straightforward. Order the correct gasket from the manufacturer using your fridge’s model number (found on a sticker inside the fridge or on the back). Most gaskets cost $50–$150 and arrive in 3–5 days.
Remove the old gasket by gently prying it out of its groove with a plastic spoon or flat-head screwdriver. Don’t force it, work your way around the door to avoid cracking the frame. The new gasket simply pushes or snaps back into place. Warm the new gasket slightly (30 seconds in warm water) to make it more flexible if it’s stubborn. Test the seal immediately with the dollar-bill method.
If your thermostat dial doesn’t hold its setting or temperature swings wildly, replacement may be necessary. The thermostat is a small capsule that switches the compressor on and off based on temperature. Replacing one requires accessing the interior control panel (procedures vary widely). This is worth attempting only if you’re comfortable with basic electrical work and have unplugged the unit. A detailed DIY repair guide covers thermostat replacement steps for several common models. If you’re unsure, a technician can swap one in 30 minutes for under $100 in labor plus the $30–$60 part cost.
When to Call a Professional Technician
Know your limits. Refrigerant leaks, failed compressors, and sealed-system repairs are off-limits for DIYers. Refrigerant is a controlled substance: handling it without certification is illegal and dangerous. If your coils are warm and the compressor won’t start, the system has likely lost refrigerant. You’ll need a licensed technician. A full recharge or compressor replacement runs $300–$1,000 depending on the fridge age and repair complexity.
If the compressor hums but doesn’t turn on, the start relay or capacitor may be fried. These are inexpensive parts ($20–$50) but require careful diagnosis and safe discharge of any residual electrical charge before removal. Many homeowners attempt this and succeed, but misdiagnosis costs time and money. If you’re uncertain, call a pro.
For cost estimates and contractor referrals in your area, services like HomeAdvisor let you compare local technician rates and read reviews. Budget $150–$250 for a service call alone: actual repairs add to that. For fridges older than 10 years, calculate whether repair costs justify replacement. A new Energy Star-rated fridge can save $100+ annually in electricity, and newer models are often more reliable.