Installing a dishwasher yourself doesn’t require a contractor’s license, but it does demand planning, the right tools, and an honest assessment of your skills. The timeline varies wildly, anywhere from two hours to an entire weekend, depending on whether you’re replacing an old unit or retrofitting a cabinet space. This guide breaks down the real-world factors that affect installation time and walks you through what to expect at each stage. Whether you’re ready to tackle the job solo or considering calling a pro, you’ll know exactly what’s involved before you unbox that new dishwasher.
Table of Contents
ToggleKey Takeaways
- How long does it take to install a dishwasher depends on the type—replacing an existing unit takes 2-3 hours, while retrofitting or custom installations can stretch to a full day or more.
- Compact and countertop dishwashers are the fastest DIY option at 30-45 minutes, making them ideal for renters or quick upgrades without cabinet modification.
- Shut off water and electrical supply before starting any dishwasher installation to prevent water damage and electrical hazards.
- Plan for discovery time when installing a dishwasher; corroded fittings, warped cabinets, and hard-to-reach plumbing connections can significantly extend your project timeline.
- Call a professional plumber if you lack a working shutoff valve, need drain line modifications, or encounter code-compliance issues—this costs far less than water damage repairs.
- Test your dishwasher with a full cycle and no dishes to check for leaks before considering the installation complete, and allow at least 10 minutes to inspect all connections.
Factors That Affect Installation Time
Dishwasher Type and Installation Complexity
Replacing an existing dishwasher with the same model or a similar-sized unit is the fastest scenario, usually two to three hours for someone with basic plumbing skills. The electrical connections, water line hookup, and drain line are already in place. You’re essentially sliding out the old unit and sliding in the new one, then reconnecting what’s already there.
A panel-ready or custom-integrated dishwasher takes longer because the cabinet door or panel must be attached or aligned to match your cabinetry. Add 30 minutes to an hour for this step if you’re not used to drilling pilot holes and adjusting hinges. Drawer-style dishwashers (like Miele’s drawer models) require different mounting hardware and clearance considerations, expect to spend three to four hours on installation if you’re new to the layout.
If you’re installing a compact or countertop dishwasher, you’re looking at 30 to 45 minutes since these don’t require cabinet modification or permanent plumbing. They simply need a water inlet line hooked to your sink faucet and a drain line placed in the sink. This is the DIY-friendly choice for renters or anyone wanting a quick upgrade.
Existing Cabinet and Plumbing Configurations
The condition of your existing cabinet opening and water lines makes a huge difference. If the previous unit lived there for ten years, the cabinet frame, flooring, and surrounding wood may need cleanup or minor repairs before the new unit fits. Warped wood, loose brackets, or damaged toe-kick trim can eat up 30 minutes to an hour of installation time.
Hard-to-reach plumbing connections underneath the sink are another wildcard. If your supply lines and drain are accessible, meaning you can crouch under the sink and reach them easily, installation goes faster. If pipes run in unusual directions, you might need to purchase extension hoses or adapters, which adds both time and potential cost. Older homes with galvanized steel supply lines can be trickier: if one connection is corroded, you may need to shut off water and make repairs before installing the dishwasher.
One more thing: your dishwasher’s height and depth must fit the cabinet opening. Standard models are around 34 inches tall and 24 inches deep (actual, not nominal dimensions). Measure twice and account for leveling feet and the toekick clearance. Forcing a unit that doesn’t quite fit leads to binding doors, poor sealing, and frustrated cursing.
Step-by-Step Installation Timeline
Preparation and Tool Setup
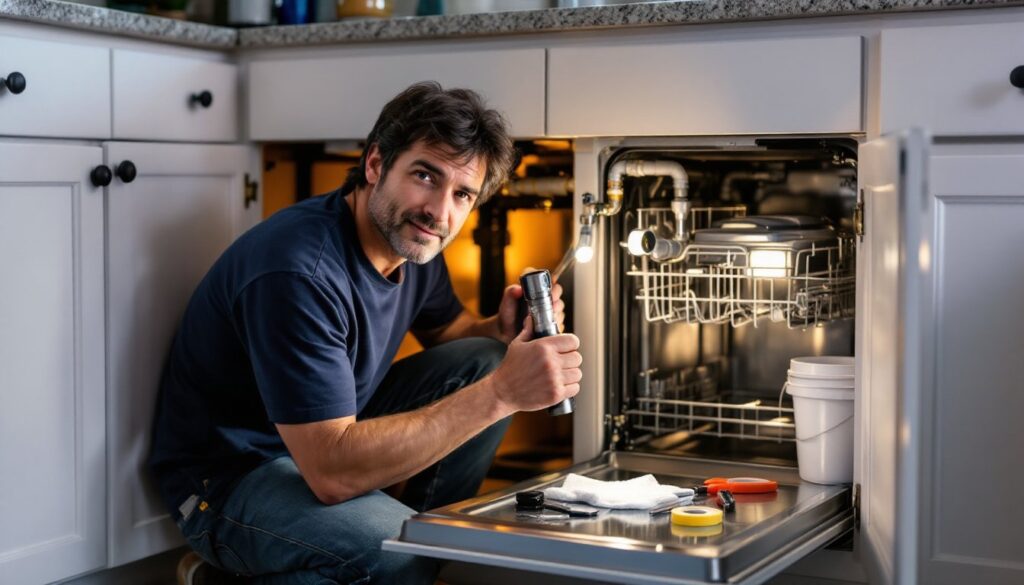
Before touching the old dishwasher, shut off the water and electrical supply. Locate the shutoff valve, usually under the sink, and turn it clockwise until it stops. This prevents water from spraying everywhere when you disconnect lines. Then flip the circuit breaker for the dishwasher outlet or light switch that controls it (check your panel label or use a voltage tester to confirm power is off).
Gather your tools: adjustable wrench, socket set, screwdrivers (Phillips and flathead), wire connectors, flashlight, level, and measuring tape. You’ll also need Teflon tape, hose clamps, and a bucket to catch residual water. If the old unit is hardwired (no plug), you’ll need a wire nut kit and wire strippers. Plumbing connections on new dishwashers typically use compression fittings, they don’t require solder or a torch, which keeps this project DIY-accessible.
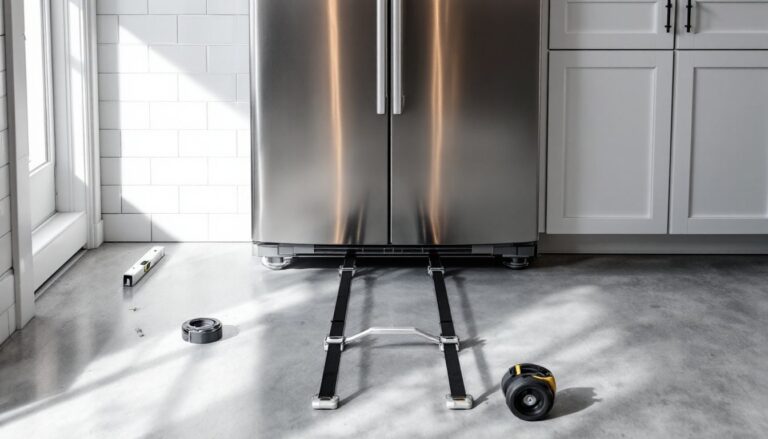
Remove the old dishwasher by unbolting the mounting brackets or screws that hold it to the countertop or cabinet frame. Disconnect the electrical connection, either a plug (unplug it) or hardwired connections (disconnect the wires and remove the junction box). Then disconnect the water inlet line and drain line. This step usually takes 20 to 40 minutes depending on how corroded or tight the connections are.
Clean out the cabinet opening once the old unit is out. Vacuum debris, wipe down wood, and check for damage. If the flooring is warped or the trim is cracked, decide now whether you’ll patch it. This is a 15-to-30-minute decision point, minor cosmetic flaws don’t affect function, but structural issues (like water damage to subfloor) need attention before the new unit goes in.
Making Connections and Testing
Slide the new dishwasher partway into the opening, not all the way yet. You need access to the connections at the back. Install the inlet water line onto the solenoid valve (the inlet on the unit). Hand-tighten the compression fitting, then use an adjustable wrench to snug it another three-quarter turn. Over-tightening can crack the fitting: tight enough that water doesn’t drip is the goal.
Connect the drain line to the drain port on the dishwasher. If you’re using a standard rubber hose, slide it on and secure it with a hose clamp. The drain line should loop up behind the dishwasher (a high loop) before dropping down to the drain, this prevents water backflow into the unit. Many setups drain into a garbage disposal: some use a standpipe or air gap fitting above the sink.
For the electrical connection, if there’s an outlet under the sink, simply plug in the unit (it should be a dedicated 120V outlet on a 15-amp breaker). If it’s hardwired, you’ll strip the sheathing from the supply cable, match wire colors to the junction box on the dishwasher (black to black, white to white, bare copper or green to ground), twist them together, and secure each pair with a wire nut. Wrap electrical tape around the bundle for safety. This takes 10 to 15 minutes if you’ve done it before, longer if not.
Slide the dishwasher the rest of the way into the opening, then use the adjustable leveling feet (usually a bolt or eccentric that you turn) to ensure the unit is level side-to-side and front-to-back. A slight forward tilt (about 1/4 inch) helps water drain properly. Attach the mounting brackets or screws to the cabinet frame to prevent the unit from sliding out when you open the door. Run a test cycle with no dishes to check for leaks underneath. Look for water around the connections and inspect the drain line for backflow. If everything’s dry after 10 minutes of running, you’re done.
Total time for this section: 45 minutes to 90 minutes, depending on your comfort with plumbing and electrical work.
When to Call a Professional Plumber
If you don’t have a shutoff valve under the sink or the valve doesn’t work, stop and call a plumber. Replacing a corroded shutoff valve can cost $100 to $300, but it’s cheaper than water damage from an accidental leak during installation. A plumber can also relocate supply lines if your new dishwasher needs connections in a different spot than the old one.
If the drain line currently goes into a vent stack or an unusual configuration, or if you need to install an air gap fitting, consult a pro first. These setups relate to plumbing code and local venting requirements, which vary. Many jurisdictions require a licensed plumber to modify drain lines. Check your local building codes before assuming you can DIY this part.
Hardwiring a dishwasher is legal for homeowners in most states, but if you’re uncomfortable with electrical work or your breaker box looks unfamiliar, hire an electrician. Mismatched voltages or improper grounding create fire hazards. Electricians typically charge $75 to $150 for a simple dishwasher hookup, and that peace of mind is worth it.
For installation timelines, professional installers typically take one to three hours, much faster because they’ve done hundreds of units. If you’re a first-timer, add 50 percent to the times listed above. Resources like Family Handyman and HomeAdvisor offer additional how-to guides and contractor referrals if you decide to hand off part or all of the work. There’s no shame in calling someone, dishwashers are heavy, cramped to work around, and water-related mistakes are expensive.
Bottom line: a replacement with straightforward plumbing takes 2 to 3 hours for a competent DIYer. A retrofit, renovation, or any work involving code compliance can stretch to a full day or more. Plan your timeline conservatively, and budget extra time for discoveries, loose brackets, hidden water damage, or corroded fittings, that only show up once you start the job.