
A carpet cleaner sitting unused in the garage won’t do anyone any good. Whether the stains are fresh spills, pet accidents, or the slow accumulation of foot traffic, knowing how to operate a Hoover carpet cleaner properly makes the difference between a mediocre clean and one that actually restores carpet fibers to near-original condition. This guide walks through the essential setup, operation, and technique needed to get professional-grade results at home. No guesswork, no wasted water and solution, just straightforward steps that work.
Table of Contents
ToggleKey Takeaways
- A Hoover carpet cleaner requires proper setup with hot water and correctly mixed solution concentrate to deliver professional-grade results and avoid equipment damage.
- Master the four-step cleaning process—apply solution, allow dwell time, extract moisture, and make a final dry pass—for optimal stain removal and faster carpet drying.
- Vacuum thoroughly before using your Hoover cleaner and test solution on hidden areas first to prevent carpet damage and avoid wasting product.
- Maintain proper technique by moving slowly with overlapping strokes, never holding the trigger while stationary, and using full suction on the final pass to prevent mold and reduce drying time.
- Empty and rinse both water tanks after every cleaning session to prevent buildup, odors, and equipment failure that compromise your machine’s longevity.
Understanding Your Hoover Carpet Cleaner Machine
Key Parts and What They Do
Every Hoover carpet cleaner shares the same basic anatomy, though specific models vary slightly. The water tanks, usually two separate chambers, sit at the top or rear. One holds clean water mixed with solution: the other collects dirty water extracted from the carpet. Both need to be easily accessible for filling and emptying without spillage.
The brush roll (or agitator) is the spinning cylinder at the bottom that scrubs carpet fibers and works solution into the pile. It rotates when the machine is powered on and in cleaning mode. The suction motor creates the negative pressure that pulls dirty water out of the carpet and into the recovery tank. Without good suction, you’ll leave wet carpet behind, which defeats the purpose.
The hose and wand assembly connects the main unit to the cleaning head. The wand is the handheld portion that lets you direct solution delivery and control the spray pattern. Most Hoover models have adjustable settings for cleaning power, solution concentration, and suction strength. Familiarize yourself with these dials or buttons before starting: they’re usually labeled on the tank or handle.
The trigger or lever on the wand controls when solution flows onto the carpet. Holding it while moving backward applies the cleaning solution: releasing it (or switching to suction mode) removes moisture without adding more liquid. Never leave solution running while stationary, you’ll oversaturate one spot and waste product.
Preparing Your Carpet and Home for Cleaning
Pre-Cleaning Steps and Safety Considerations
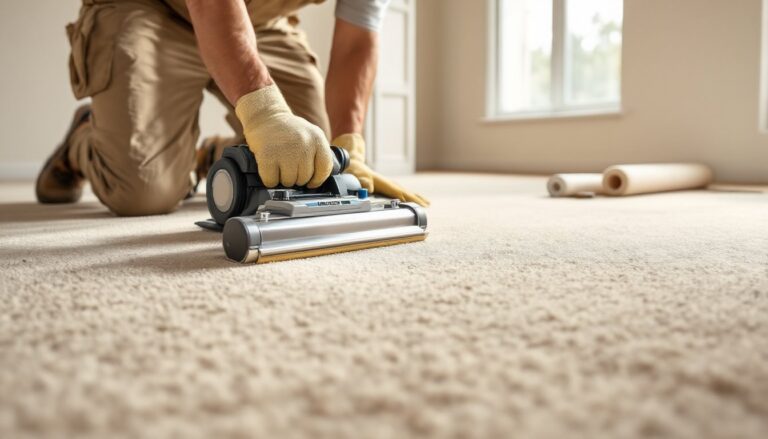
Before powering on, remove all loose items from the floor: toys, books, small furniture, cords. A Hoover cleaner will jam or get tangled if the nozzle sucks up a toy car or power cable. Vacuum the entire carpeted area thoroughly with a standard upright or handheld vacuum first. This removes surface dust, pet hair, and debris that would otherwise clog the machine’s intake or dirty your cleaning solution prematurely.
Test any stained or delicate areas in a corner or closet with your cleaning solution at full strength. Some dyes, especially in older or imported rugs, can bleed or fade. A small, inconspicuous spot test prevents costly damage. If the carpet color holds and doesn’t transfer to a white cloth, proceed: if it does, use a much lighter solution concentration or skip that area.
Wear safety glasses and gloves while handling cleaning solution concentrate. The solution can irritate skin and eyes, and you’ll be kneeling on wet carpet, so slip-resistant footwear or bare feet (not socks) reduce falling risk. Ensure the room is well-ventilated, open windows and run a fan if possible. The combination of moisture and indoors can promote mold growth if humidity isn’t managed during and after cleaning.
Check that all carpet seams, corners, and edges are secure before you start. If the carpet is already lifting or separating, aggressive cleaning can worsen it. Stains that are set in (older than a few days) may require pre-treatment with a spot cleaner 15–30 minutes before machine cleaning. Let the pre-treatment soak: don’t let it dry completely.
Filling the Water Tank and Mixing Solutions
Most Hoover models use a concentrated formula, not a ready-to-use solution. Always follow the manufacturer’s mixing ratio on the bottle, usually something like one part concentrate to four parts hot water, but it varies. Using too much concentrate wastes product and leaves sticky residue: too little and the cleaning power drops. Hot water (not boiling, but as hot as your tap will go) activates the cleaning agents and is more effective at breaking down oils and grime.
Remove the clean water tank from the machine (usually a handle or press-release latch at the top or back). Fill it with hot water first, then add the prescribed amount of cleaner concentrate. Close the tank securely, a loose cap will leak everywhere when you reinsert it. If your Hoover uses a separate solution dispenser bottle, fill that according to the manual, since some models auto-meter the concentrate into the water flow.
Reinsert the clean water tank into the machine with a firm click or twist, depending on the model. You should hear or feel it lock into place. The dirty water tank (or recovery tank) should be empty before you start. After cleaning, you’ll be surprised how much brown water fills it even on supposedly “light” jobs, that’s dirty water being extracted from the carpet. If it gets too full, the machine’s suction weakens and it may back up or spray dirty water onto already-cleaned areas.
Do not skip filling the clean water tank. A Hoover running on empty or insufficient water will heat-stress the pump, produce weak solution output, and leave minimal moisture to extract, defeating the entire cleaning process. Some models have a low-water indicator light: pay attention to it.
Operating Your Hoover Cleaner: The Cleaning Process
Proper Technique for Best Results
Plug the machine into a grounded outlet and press the power switch. Let it run for 10–15 seconds so the pump pressurizes and water reaches the hose. You’ll hear a slight change in tone when it’s ready. Position yourself at one end of the room, facing toward the exit so you don’t have to walk over cleaned carpet.
Step 1: Apply solution. Squeeze the trigger (or engage the solution lever) and slowly move the wand backward toward you with smooth, overlapping strokes. Each pass should overlap the previous one by about one-third to ensure even coverage. Move at about one foot per second, rushing misses coverage and wastes solution. Don’t hold the trigger down while stationary: keep moving.
Step 2: Let solution dwell. After applying solution to a 3–4 foot section, release the trigger and wait 2–3 minutes. This allows the cleaning agents to break down oils and grime. For heavy stains, lightly agitate with the brush roll engaged (if your model allows stationary brushing) before moving on.
Step 3: Extract. Engage suction mode (most models have a separate button or lever). Move the wand forward slowly over the same section you just treated. The forward stroke pulls moisture up and out. Make 2–3 forward passes over each area, overlapping as before. You should see dirty water flowing into the recovery tank. If you see almost no flow, either the suction isn’t strong enough or you need more dwell time.
Step 4: Final pass. Make one final forward pass without any solution to pull out remaining moisture. This dry extraction pass is critical, wetter carpet takes longer to dry and invites mold.
Some stubborn stains need a second round: apply solution, wait, and extract again. Deep carpets (like Saxony or frieze) may require slower movement and longer dwell times than low-pile. Drying time typically ranges from 4–12 hours depending on humidity, air flow, and carpet thickness. Run ceiling fans and open windows to accelerate drying. Avoid walking on the carpet until it’s dry to prevent re-soiling and tripping hazards.
After every use, empty both tanks, rinse them out, and run clean water through the hose with the trigger engaged to purge remaining solution. This prevents buildup, mold, and odors. Store the machine with the tanks removed so air can circulate inside.