A refrigerator that runs efficiently is one of the hardest-working appliances in your home, but most homeowners overlook a critical maintenance task: defrosting. Over time, frost buildup in the freezer section reduces cooling efficiency, forces your compressor to work harder, and can even compromise food preservation. Whether your fridge has an automatic defrost cycle or requires manual maintenance, understanding how to defrost a refrigerator properly will extend its lifespan and keep energy bills in check. This guide walks you through the process step-by-step, covering both methods so you can tackle the job with confidence.
Table of Contents
ToggleKey Takeaways
- Regular defrosting of your refrigerator prevents frost buildup from forcing your compressor to work harder, reducing energy bills and extending appliance lifespan.
- Manual defrosting typically takes 4–8 hours and requires safe tools like plastic scrapers and warm water—never use metal scrapers or heat guns to avoid damaging internal components.
- Signs your fridge needs defrosting include visible ice thicker than ¼ inch, reduced cooling performance, blocked vents, unusual compressor noises, and water pooling at the bottom.
- Modern frost-free refrigerators automatically defrost every 6 to 8 hours, but a clogged defrost drain is the most common failure point that causes water backup and ice buildup.
- Clear the defrost drain twice yearly using warm water and a turkey baster to prevent blockages, and always unplug your refrigerator before performing any manual maintenance.
- Check your refrigerator’s owner’s manual monthly for frost accumulation and follow the manufacturer’s specific defrosting instructions for your model.
Why Regular Defrosting Matters for Your Fridge’s Performance
Frost accumulation is inevitable in refrigerators, it’s moisture in the air that freezes when exposed to cold surfaces. Left unchecked, a thick frost layer acts like insulation in reverse, preventing cold air from reaching food and forcing your compressor to cycle longer and harder. This isn’t just an efficiency problem: it’s a wear-and-tear accelerator. Your compressor, the heart of the cooling system, has a finite lifespan. Every extra cycle it runs shaves hours off that lifespan and drives up your electric bill.
Beyond performance, frost buildup can create other headaches. Ice can block air vents, creating dead zones where food doesn’t stay cold. Frost can also trap odors and promote bacterial growth if meltwater pools in the wrong spots. Regular defrosting, whether triggered by your fridge’s built-in system or done manually, keeps the unit running at design capacity. Most modern refrigerators with automatic defrost cycles handle this task every 6 to 8 hours, but manual-defrost models or those with compromised defrost systems need your attention.
Signs Your Refrigerator Needs Defrosting
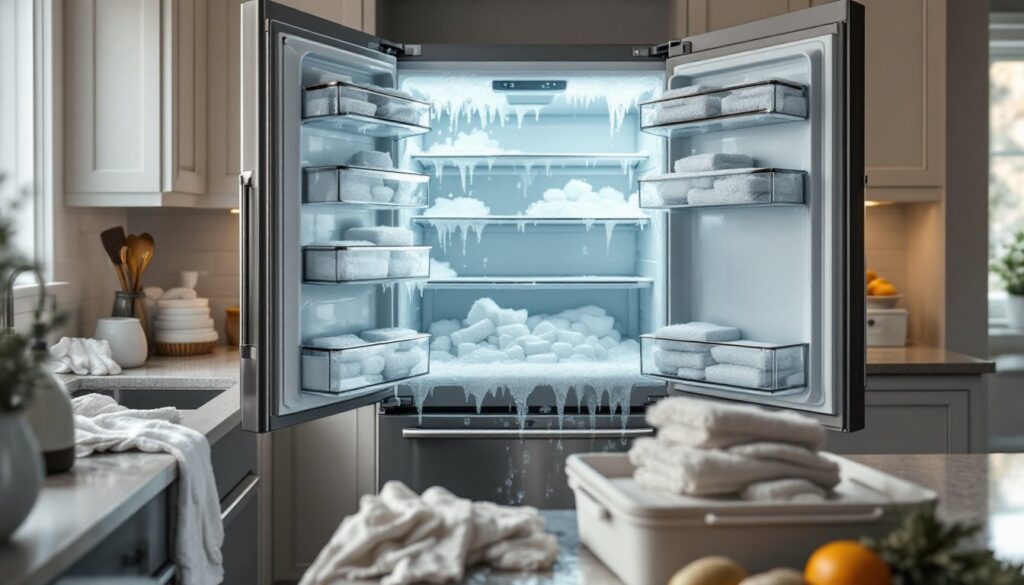
Not all refrigerators require manual defrosting, many have automatic systems that cycle throughout the day. But, you’ll know manual defrosting is necessary when you spot visible ice buildup thicker than ¼ inch on the freezer coils or walls. Another red flag is reduced cooling performance even though the thermostat being set correctly. If ice blocks the vents where cold air flows into the refrigerator section, your fridge may not stay cold enough.
Additional warning signs include unusual noises (a struggling compressor), frost spreading across the entire freezer compartment, or moisture pooling at the bottom of the fridge. Some refrigerators have a defrost drain that can become clogged, backing up meltwater into the food compartment. If you’re seeing water or ice buildup where it shouldn’t be, defrosting is overdue. Check your owner’s manual, it will clarify whether your model has automatic defrost and how to access manual defrost controls if needed.
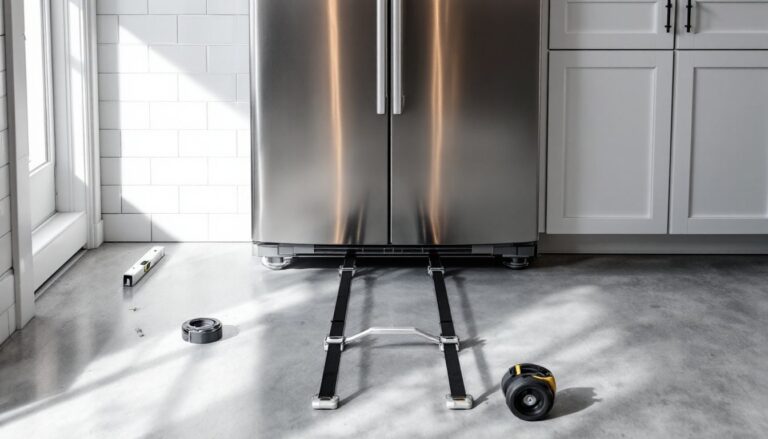
Preparation: What You’ll Need Before You Start
Before you begin, gather your supplies and plan for safety and convenience. You’ll need:
• Coolers or insulated bags (to temporarily store perishables)
• Towels and absorbent cloths (meltwater will flow)
• A shallow pan or tray (to catch drips: a roasting pan works well)
• Plastic scraper or wooden spoon (never use metal, it can damage coils)
• Warm water in a spray bottle or bucket (to speed melting without damaging the fridge)
• Basic sockets or a hex key (if your model requires removing the back panel to access the defrost drain)
Safety note: Always unplug your refrigerator before beginning any manual defrosting. This prevents accidental contact with electrical components and gives you full control. Clear a workspace around the fridge, you’ll need room to position pans and move freely.
Next, remove all food from the freezer and most items from the refrigerator section. Perishables like dairy, meat, and prepared foods should go into coolers packed with ice packs. Non-perishables and condiments can sit on a clean counter for an hour or two. Check the humidity and temperature in your kitchen: if it’s warm, this task will take longer. On a cool day, defrosting may happen faster.
The Manual Defrosting Method
Manual defrosting is straightforward but requires patience. Once your fridge is unplugged and cleared, leave the freezer and refrigerator doors open to allow air circulation. Position towels and a shallow pan under any visible drip points.
For faster melting, place bowls of hot water on the freezer shelves (replace them every 30 minutes as they cool). Alternatively, use a warm spray bottle to gently mist frost-covered areas. Avoid pouring hot water directly onto the coils, thermal shock can damage components. As ice softens and begins falling, carefully scrape it away using a plastic scraper. Work in sections and let gravity do the work: don’t force chunks loose.
Once bulk ice has been removed, flush the defrost drain (usually a small opening at the back of the fridge or freezer). Use a turkey baster or syringe filled with warm water to clear any blockage. Listen for water flowing freely into the drain pan below, that confirms the drain is working.
This method typically takes 4–8 hours depending on frost thickness. Speed it up by increasing room temperature or applying more hot water. Never use a hair dryer or heat gun near the fridge, the risk of electrical hazard or damaging plastic components isn’t worth the time saved. When frost is gone and draining is clear, dry all interior surfaces with a clean cloth, return food to the fridge, and plug the unit back in.
Using the Defrost Cycle Feature
Modern frost-free refrigerators (also called “auto-defrost”) use a built-in defrost cycle that runs automatically, typically every 6 to 8 hours. This cycle heats the evaporator coils briefly to melt any frost, then drains the meltwater through a drain line to an evaporator pan below the fridge where it evaporates naturally.
If your fridge has this feature, you rarely need to intervene, the system handles defrosting without any action on your part. But, a clogged defrost drain is the most common reason this system fails. Water backs up into the fridge instead of flowing down the drain, creating pools and ice buildup. Many frost-free refrigerators encounter this problem due to debris or mineral deposits blocking the drain line.
To troubleshoot, locate the defrost drain (consult your manual for its exact location). You’ll typically find it at the back of the refrigerator section or inside the freezer. Flush it using a turkey baster or a syringe filled with warm water mixed with a drop of dish soap. Push water through until it flows freely into the pan below. Some models have an accessible drain plug you can remove to clear blockages manually.
If flushing doesn’t solve water pooling, the drain line itself may be kinked or blocked deeper in the system. In this case, you may need to remove the fridge’s back panel (usually held by a handful of bolts) to access the drain line. Check your owner’s manual before attempting this, if you’re uncomfortable, calling a technician is the safer route.
Conclusion
Defrosting your refrigerator is a straightforward maintenance task that pays dividends in efficiency and appliance longevity. Whether you’re manually clearing ice or troubleshooting an automatic defrost cycle, the key is addressing the issue promptly. Establish a routine, check for frost buildup monthly and clean the defrost drain twice a year. Your fridge will run cooler, quieter, and longer. When in doubt about your model’s specific requirements, your owner’s manual is your best resource, and a professional repair service is always available if complications arise.