
A refrigerator not cooling is one of those problems that feels urgent, you’ve got perishable food, a ticking clock, and a wallet that doesn’t want a repair bill. Before you call for service or start shopping for a replacement, take a breath. Many cooling issues are things you can diagnose yourself in under an hour. This guide walks you through seven practical troubleshooting steps that address the most common culprits: thermostat glitches, clogged coils, bad gaskets, fan failures, refrigerant leaks, and airflow blockages. You won’t need specialized tools, just a flashlight, basic cleaning supplies, and patience. If the problem points to something beyond a DIY fix, we’ll tell you straight up when it’s time to call a professional.
Table of Contents
ToggleKey Takeaways
- Check your refrigerator thermostat settings first—many cooling problems result from accidental adjustments, and a simple dial reset can resolve the issue within 4–6 hours.
- Clean condenser coils regularly to fix weak cooling, as dust and debris buildup is one of the most common culprits and takes just 15 minutes to address.
- Inspect door gaskets for tears or poor seals by performing a simple dollar bill test, since a leaking seal forces the fridge to work harder and allows cold air to escape.
- Verify the evaporator fan is running by listening for a humming sound and checking for ice blockages, as a non-functioning fan prevents cold air from reaching the main compartment.
- Clear air vents and passages of obstructions to ensure proper airflow, which is equally important as refrigerant for maintaining cooling efficiency.
- Know when to call a professional—if your refrigerator still won’t cool after troubleshooting these steps, issues like compressor failure or refrigerant leaks require certified technician repair.
Check The Thermostat And Temperature Settings
Start here because it’s the easiest thing to overlook. Most refrigerators have a thermostat dial or digital controls inside, usually on the wall or door area. If the thermostat was accidentally bumped down to a lower setting (or off entirely), your fridge won’t cool properly, or at all. Open your fridge and look for the control. On older models, it’s often a numbered dial (1 to 5, with higher numbers meaning colder). On newer units, you’ll find a digital display. Check what the current setting is and confirm it’s in the right range for your model. If it’s been turned down, adjust it back up and wait 4 to 6 hours for the temperature to stabilize. Keep a fridge thermometer inside (a basic analog one costs a few dollars) to verify the internal temperature is staying around 35–38°F. If the thermostat isn’t responding to adjustments or the temperature won’t hold steady, the thermostat itself may be failing. That’s typically a professional repair, but at least you’ve ruled out the simplest fix.
Clean Or Replace The Condenser Coils
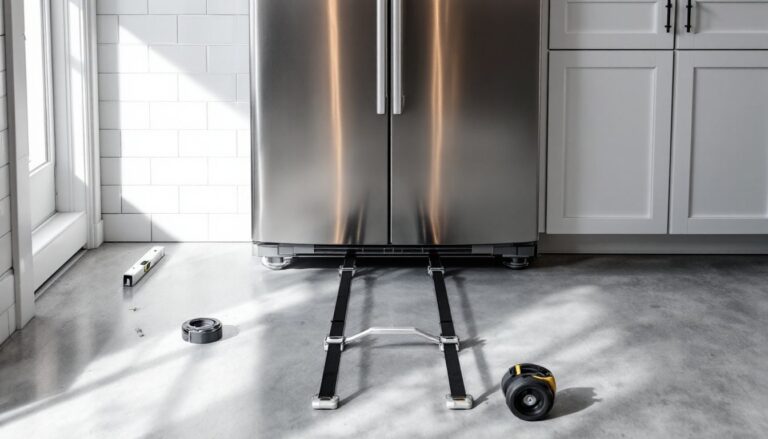
The condenser coils are the cooling engine of your refrigerator. They release heat and sit behind the unit (in older models) or beneath it (in most modern fridges). Over months or years, dust, pet hair, and debris build up on these coils, choking the cooling process. A quick visual inspection is your first move: pull the fridge away from the wall (carefully, watching for the water line) and look at the coil area. If you see a thick blanket of dust, that’s your problem. Grab a stiff brush or a coil cleaning tool (sold at most hardware stores for under $20) and gently brush the coils. Vacuum around the area afterward with a soft brush attachment. This is maintenance that takes 15 minutes and often fixes weak cooling instantly. Wear a dust mask if you’re sensitive to dust. If your fridge has coils underneath, you may need to remove a small front panel (usually held on with clips or a few screws). Consult your manual for exact location. If the coils are damaged or corroded, replacement is a professional job and can get expensive, but cleaning a neglected coil set is almost always worth trying first.
Inspect The Door Seals And Gaskets
A leaking door seal is like leaving your fridge door propped open, cold air escapes, and the unit has to work harder (or just gives up). The rubber gasket that runs around the door edge wears out over time, especially if it’s been slammed or if the door hasn’t been closed all the way. Run your hand around the gasket while the door is closed. Feel for tears, gaps, or areas where it doesn’t make firm contact with the frame. A simple test: close a dollar bill in the door and try to pull it out. If it slides out easily, the seal isn’t tight. If the gasket is visibly cracked or shrunken, replacement is straightforward. Most gaskets unscrew or clip out (your manual will show you which), and new ones typically cost $50–$150 depending on the model. Before you replace it, try cleaning the gasket and frame with soapy water and a soft cloth to remove any dirt or debris that might be preventing a proper seal. Sometimes that’s all it takes. If the gasket looks fine but you suspect a leak, use a flashlight to look for frost buildup inside the fridge along the door edges, that’s a telltale sign of air leakage.
Verify The Evaporator Fan Is Working Properly
The evaporator fan pulls cold air from the freezer into the fridge compartment. If it’s not running, the fridge stays warm even if the freezer is cold. Listen carefully with your ear close to the fridge (without opening it) for a faint humming sound. When the door is open, you might also hear the fan blade gently spinning behind the freezer wall. If you hear nothing or the sound is very weak, the fan might be iced over, blocked, or broken. A blocked fan is usually caused by frost or food packaging getting in the way, pop open the freezer cover panel (usually at the back, held by clips or screws) and look inside. Unplug the fridge first before you do this. Clear any ice buildup with a plastic scraper (don’t use metal, it damages the coils) or let frost melt naturally. If the fan blade is physically broken, you’ll need a replacement, which is a moderately technical job, most homeowners can handle it with a manual and a screwdriver, but if you’re not confident opening up your fridge, call a pro. A working evaporator fan is essential for proper cooling, so this step matters.
Check For Refrigerant Leaks And Airflow Issues
Refrigerant is the magic ingredient that keeps your fridge cold. If there’s a leak, cooling performance drops steadily. You can’t recharge refrigerant yourself (it requires EPA certification and special equipment), but you can look for signs of a leak. Listen for a hissing sound near the coils or connection points. Look for oily stains or frost patterns that suggest escaping refrigerant. Check vents and air passages inside the fridge and freezer to make sure nothing is blocking airflow, items shouldn’t be pushed against the back or sides where cold air enters. Proper airflow is as important as the refrigerant itself. If you suspect a leak, most sources like refrigerator repair guides recommend having a licensed technician diagnose and fix it. Refrigerant leaks are a job for someone certified. But, checking that air vents are clear and unblocked is something you absolutely should do right now, it’s free and often solves weak cooling on its own.
Know When To Call A Professional
You’ve done your assignments: checked the thermostat, cleaned the coils, inspected the gaskets, verified the fan, and confirmed airflow. If the fridge is still not cooling after all that, it’s time to stop troubleshooting and call a service tech. Compressor failures, refrigerant leaks, faulty thermostats, and broken fans all require professional diagnosis and repair. When you call, mention what you’ve already checked, it saves time and shows the tech you’re serious. Get a diagnosis cost upfront and ask about warranty on parts and labor. Depending on the repair and your fridge’s age, you might also want to compare repair costs against replacement. A refrigerator older than 10–12 years that needs a major component replaced might not be worth fixing. According to common cooling issues, compressor replacement alone can run $400–$800 plus labor. For perspective, a decent mid-range fridge starts around $600–$800, so factor that into your decision. If your fridge is newer or the repair is straightforward (like a gasket or fan), it’ll almost always be worth fixing.
Conclusion
Most refrigerator cooling issues stem from simple fixes: wrong settings, dirty coils, bad seals, or airflow blockages. Before assuming your fridge is dying, walk through these seven steps methodically. Cleaning coils and checking gaskets alone solve the majority of DIY-fixable problems. You’ll either get your fridge back online and save a repair call, or you’ll know exactly what the problem is when you do call a pro. Either way, you’ve earned the satisfaction of troubleshooting like a neighbor who actually knows their tools.